지난 시간에 스마트 계약의 작성과 배포, 검색까지 진행해봤다
이번엔, 우리의 스마트 계약에 기능을 더 추가해 보자ㅏㅏ
먼저,
1. 선거에 출마할 후보자 리스트 뿌리기
이를 위해 우리는 여러 후보자들과
각 후보자들을 구분시켜 줄 특징을 저장해야한다
각 후보자에게
후보자 번호(id),
이름(name),
득표수(voteCount)의 속성을 부여해보자
그렇게 하기 위해서,
우리가 작성한 Election.sol파일을 아래와 같이 수정해보자
contract Election {

    // Model a Candidate
    struct Candidate {
    	// 후보자 한명은 후보자 번호, 이름, 득표수를 가진 구조체로 선언한다
        uint id;
        string name;
        uint voteCount;
    }

    // ...
}
후보자 모델링이 끝났다
하지만,
스토리지에 후보자들 정보를 저장하기 위해선
우리가 방금 정의한 후보자 구조체의 인스턴스를 저장할 수 있는 변수가 하나 필요하다
때문에 mapping을 이용해서
struct 코드 아래에 후보자들의 정보( 구조체 )를 저장하는 코드를 써준다
그리고 그 아래에 총 후보자들을 카운트하는 코드도 함께 작성해주자ㅏㅏ
contract Election {
    // Model a Candidate
    struct Candidate {
        uint id;
        string name;
        uint voteCount;
    }

    // Read/write Candidates
    // mapping의 key값은 unsigned integer 데이터 타입
    // value값은 우리가 조금 전에 정의한 Candidate 구조체
    // 이로써 우리는 후보자들의 id(uint)로 후보자를 조회할 수 있게 되었다
    // 우리가 만든 후보자 mapping은 contract 하위에 위치한 state variable(Java에서의 전역변수와 유사)(반대되는 개념: local variable)이기 때문에
    // 새로운 key-value로 언제든지 블록체인에 데이터를 기록할 수 있다
    // 또한 public으로 선언했기 때문에 getter function을 자동으로 갖게되어 외부에서 함수 호출만으로 조회가 가능하다
    mapping(uint => Candidate) public candidates;

    // 후보자 Counter 선언
    // Store Candidates Count
    // 선거에 참여하는 후보자들의 수 변수 선언
    uint public candidatesCount;
}
이후, 아래에 후보자들을 추가하는 함수를 생성해준다
	// 후보자들을 추가하는 함수
	// 이 함수는 contract 내부에서만 호출할 수 있도록 private으로 선언
    	function addCandidate (string memory _name) private {
        candidatesCount ++;
        candidates[candidatesCount] = Candidate(candidatesCount, _name, 0);
    }
해당 함수에 후보자 이름을 파라미터 값으로 보내면,
후보자 카운트를 1증가 시키고,
해당 후보자 카운트 인덱스 번호의 후보자에
후보자 카운트 번호, 이름, 0 ( 초기 득표수 ) 를 할당한다
이제, 계약이 배포될 때 후보자 2명이 함께 생성되도록 해보자
    // 계약이 배포될 때 2명의 후보자를 함께 생성하는 함수
    constructor() public {
        addCandidate("Candidate 1");
        addCandidate("Candidate 2");
    }
이렇게 해주면, 우리의 계약 코드가 블록체인에 배포될 때,
migration을 통해 2명의 후보자가 생성되며 실행될 것이다
그렇게해서, 완성된 Election.sol 코드는 아래와 같다ㅏㅏ
pragma solidity 0.5.0;

contract Election {
    // Model a Candidate
    struct Candidate {
        uint id;
        string name;
        uint voteCount;
    }

    // Read/write candidates
    mapping(uint => Candidate) public candidates;
    // Store Candidates Count
    uint public candidatesCount;

    constructor() public {
        addCandidate("Candidate 1");
        addCandidate("Candidate 2");
    }

    function addCandidate (string memory _name) private {
        candidatesCount ++;
        candidates[candidatesCount] = Candidate(candidatesCount, _name, 0);
    }
}
요로케 코드를 완성 한 후,
migrate를 실행 해보자
truffle migrate --reset
+++ 테스트 코드 작성하기
Ganache는 미리 실행시켜두고,
우리가 적은 로직들이 잘 작동하는지를 알아보기 위해 테스트 코드를 작성해보자ㅏㅏ
( dApp에서 테스트 코드는 거의 필수라 보면 된다ㅏㅏ )
cmd나 git bash에서 아래의 코드를 쳐서 test 폴더에 테스트 파일을 만든다
touch test/election.js
만들어진 파일을 열고, 아래와 같이 Election.sol의 코드를 점검하는 test 코드를 적어주자
// test code 작성
// 투표 기능을 테스트하기 위해서 “election.js” 테스트 파일에 코드를 추가

// contract를 require로 가져와서 변수에 할당
var Election = artifacts.require("./Election.sol");

// “contract” 함수를 호출하여 callback 함수형태로 테스트를 작성
// 이 callback 함수는 우리 블록체인( Ganache의 ) 모든 accounts들을 “accounts”라는 변수로서 제공
contract("Election", function(accounts) {
  var electionInstance;

  // 후보자 수가 2명이 맞는지 확인하는 테스트
  it("initializes with two candidates", function() {
    return Election.deployed().then(function(instance) {
      return instance.candidatesCount();
    }).then(function(count) {
      assert.equal(count, 2);
    });
  });

  // 각 후보자들의 속성값들을 검증하는 테스트
  it("it initializes the candidates with the correct values", function() {
    return Election.deployed().then(function(instance) {
      electionInstance = instance;
      return electionInstance.candidates(1);
    }).then(function(candidate) {
      assert.equal(candidate[0], 1, "contains the correct id");
      assert.equal(candidate[1], "Candidate 1", "contains the correct name");
      assert.equal(candidate[2], 0, "contains the correct votes count");
      return electionInstance.candidates(2);
    }).then(function(candidate) {
      assert.equal(candidate[0], 2, "contains the correct id");
      assert.equal(candidate[1], "Candidate 2", "contains the correct name");
      assert.equal(candidate[2], 0, "contains the correct votes count");
    });
  });
});
프로젝트 폴더 경로에서 cmd나 git bash를 열고,
truffle test를 치고 엔터를 누르면,
각 테스트코드가 실행되고,
정상적으로 완료되었는지,
완료하기까지 얼마나 걸리는지가 나오게 된다ㅏㅏ
2. 클라이언트 앱을 브라우저에서 확인하기
이제, 해당 코드들을 웹 페이지에 띄워보자
Truffle Pet Shop box 에서 기본적으로 생성되어 있는 index.html을 활용할 것이다ㅏㅏ
index.html 파일을 열고,
아래와 같이 코드를 수정해주자
<!DOCTYPE html>
<html lang="en">
  <head>
    <meta charset="utf-8">
    <meta http-equiv="X-UA-Compatible" content="IE=edge">
    <meta name="viewport" content="width=device-width, initial-scale=1">
    <title>Election Results</title>

    <!-- Bootstrap -->
    <link href="css/bootstrap.min.css" rel="stylesheet">
  </head>
  <body>
    <div class="container" style="width: 650px;">
      <div class="row">
        <div class="col-lg-12">
          <h1 class="text-center">Election Results</h1>
          <hr/>
          <br/>
          <div id="loader">
            <p class="text-center">Loading...</p>
          </div>
          <div id="content" style="display: none;">
            <table class="table">
              <thead>
                <tr>
                  <th scope="col">#</th>
                  <th scope="col">Name</th>
                  <th scope="col">Votes</th>
                </tr>
              </thead>
              <tbody id="candidatesResults">
              </tbody>
            </table>
            <hr/>
            <p id="accountAddress" class="text-center"></p>
          </div>
        </div>
      </div>
    </div>

    <!-- jQuery (necessary for Bootstrap's JavaScript plugins) -->
    <script src="https://ajax.googleapis.com/ajax/libs/jquery/1.12.4/jquery.min.js"></script>
    <!-- Include all compiled plugins (below), or include individual files as needed -->
    <script src="js/bootstrap.min.js"></script>
    <script src="js/web3.min.js"></script>
    <script src="js/truffle-contract.js"></script>
    <script src="js/app.js"></script>
  </body>
</html>
다음으로,
app.js 파일을 아래와 같이 수정해준다 ( app.js 파일은 클라이언트 사이드의 미들웨어 역할을 한다 / 라우팅 및 리소스 관리 )
App = {
  web3Provider: null,
  contracts: {},
  account: '0x0',

  init: function() {
    return App.initWeb3();
  },

  initWeb3: function() {
    if (typeof web3 !== 'undefined') {
      // If a web3 instance is already provided by Meta Mask.
      App.web3Provider = web3.currentProvider;
      web3 = new Web3(web3.currentProvider);
    } else {
      // Specify default instance if no web3 instance provided
      App.web3Provider = new Web3.providers.HttpProvider('http://localhost:7545');
      web3 = new Web3(App.web3Provider);
    }
    return App.initContract();
  },

  initContract: function() {
    $.getJSON("Election.json", function(election) {
      // Instantiate a new truffle contract from the artifact
      App.contracts.Election = TruffleContract(election);
      // Connect provider to interact with contract
      App.contracts.Election.setProvider(App.web3Provider);

      return App.render();
    });
  },

  render: function() {
    var electionInstance;
    var loader = $("#loader");
    var content = $("#content");

    loader.show();
    content.hide();

    // Load account data
    web3.eth.getCoinbase(function(err, account) {
      if (err === null) {
        App.account = account;
        $("#accountAddress").html("Your Account: " + account);
      }
    });

    // Load contract data
    App.contracts.Election.deployed().then(function(instance) {
      electionInstance = instance;
      return electionInstance.candidatesCount();
    }).then(function(candidatesCount) {
      var candidatesResults = $("#candidatesResults");
      candidatesResults.empty();

      for (var i = 1; i <= candidatesCount; i++) {
        electionInstance.candidates(i).then(function(candidate) {
          var id = candidate[0];
          var name = candidate[1];
          var voteCount = candidate[2];

          // Render candidate Result
          var candidateTemplate = "<tr><th>" + id + "</th><td>" + name + "</td><td>" + voteCount + "</td></tr>"
          candidatesResults.append(candidateTemplate);
        });
      }

      loader.hide();
      content.show();
    }).catch(function(error) {
      console.warn(error);
    });
  }
};

$(function() {
  $(window).load(function() {
    App.init();
  });
});
위의 app.js 소스를 살펴보자면,
- web3 세팅 : web3.js는 클라이언트 앱에서 블록체인과 연결되기 위한 javascript 라이브러리
우리는 “initWeb3”라는 함수로 web3를 설정해줬다 - contracts 초기화 : “initContract”라는 함수 내부에서 배포된 스마트 계약 인스턴스를 가져온다
그리고 contracts와 소통할 수 있도록 만들어줄 몇몇 변수를 할당한다 - Render 함수: render 함수는 페이지에 스마트 계약에서 가져온 데이터들을 보여줄 수 있는 역할을 해준다
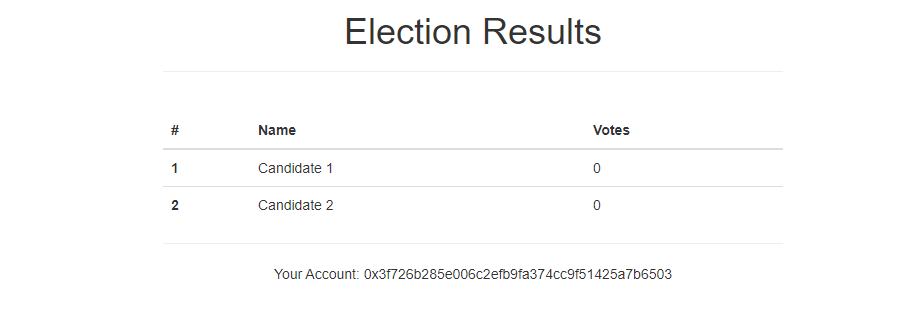
여기서 우리는 스마트 계약에서 생성한 후보자들을 테이블에 렌더링 해주었다
또한, 현재 블록체인에 연결되어 있는 사용자 계정을 페이지 하단에 보여주도록 하였다
브라우저에 우리가 작성한 해당 페이지를 띄우기 전에,
migration을 한번 더 점검해주자ㅏㅏ
truffle migrate --reset엔터 후,
npm run dev해주면,
자동으로 브라우저가 띄워지며 Loading 화면이 나오게 된다
이는 아직 우리가 블록체인에 로그인되어 있지 않기 때문이다
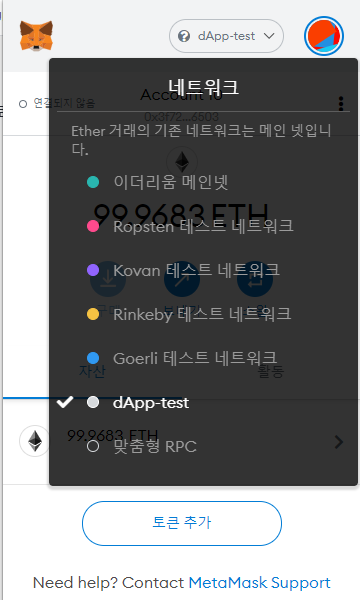
우리의 dApp을 블록체인에 연결하기 위해서는 Ganache에 있는 계정을 Metamask에 임포트해줘야한다
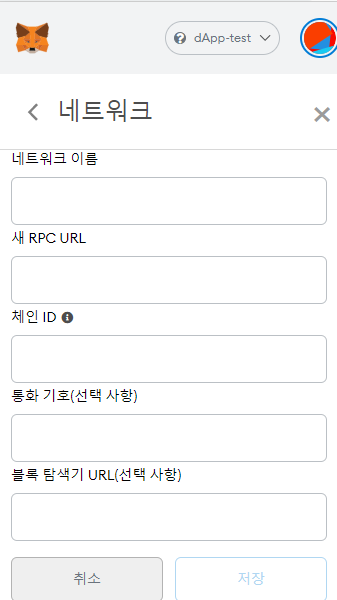
브라우저에서 MetaMask를 열고,
맞춤형 RPC를 클릭해 새로운 RPC URL을 설정 후, 저장해주자
이렇게 해서 로그인이 끝나면, 클라이언트 페이지가 아래처럼 예쁘게 뜬다!
'BlockChain > Ethereum' 카테고리의 다른 글
| CA(계약 계정)는 Instance인가? [ 스마트 컨트랙트 ] (2) | 2021.06.01 |
|---|---|
| 이더리움 주소, 키, 계정의 구성과 역할 이해하기 (0) | 2021.05.31 |
| Ethereum(이더리움) 투표 dApp 개발 1 (0) | 2021.05.31 |
| 이더리움- dApp 개발환경 구축하기 [Windows] (0) | 2021.05.31 |
| 이더리움 기반 ERC-20 규격의 토큰 만들어보기 2 (2) | 2021.05.31 |

